
The tile we chose
After the floorwas done and we decided we were going to addtile, at this point I started having fun creating a “Better Homes and Garden Bathroom.” I have laid tile, lots of tile, I mentioned my dad and uncle well neither of them liked laying tile so would do the majority of the work under their supervision. I’ve mentioned once or twice I went to school for Historic Preservation one of the things I never mentioned is the 15 page research paper on masonry joint systems, which went into great depth about mortar (including tiling). I pretty much have this vast array of useless knowledge regarding mortar. I know if people who do this for a living read this they will probably cringe because of how I did it. I want to state this “backsplash” is decorative only, meaning I did not need Backer Board (Wonderboard or Tile Board) if I was doing this in a shower, tub or the floor I would have used the Backer Board. I also want to say when mixing mortar and grout YOU NEED A MASK! Inhaling essentially Portland Cement is NOT recommended and your lungs will thank you for wearing a mask. I am going to share the ratio of water to mortar with you because if you are like me you do not need enough mortar to do 25 sq.ft. I needed enough to do maybe 5 at the most after searching for a good 20 minutes I finally found the ratio of water to mortar.
The ratio of water to mortar is 6:25 (that is six parts water to twenty-five parts mortar).
I know someone, somewhere is thanking me for this information and you are welcome. The consistency should be like frosting, not runny stays put but can be spread, if you are more of a consistency person (like myself). Since it was mortar and going to be holding the tile up forever (because I am never replacing that bathroom) I wanted to ensure the mix was right (it had been close to 15 years since I mixed mortar.) You will need a trowel in order to spread your mortar.

A trowel for spreading mortar on walls the grooves help keep the tiles in place.
The other thing I want to state is I purposely started tiling this wrong I tiled from the bottom up not from the top down, I also did not start from the corner and work out I started from the door frame and worked in. My reason was I didn’t want a cap around the top I am not a fan of caps, I love the even grouted look in order to achieve that look you need it level, the easiest way to get it level is to start from the bottom and work up. The corner was difficult because I did it this way but the top is perfectly level and for me was well worth the headache the corner gave me.

This is the only shot I got of the mortar and the tile (I forgot to take photos). As you can see I was quite liberal with the mortar.

Letting the mortar set for 16-24 hours
Grouting, I am going to be the first to tell you grouting is messy and a pain but if you do it right it will look FANTASTIC! The first thing you will want to do it “clean” the spaces with either a grout cleaner or a flat head screw driver (I used the later because I forgot to buy a grout cleaner). Your goal is to gently remove any mortar from the grooves so the grout will “fill” the grooves. Depending on how generous you were with the mortar it can be a very quick process or a very long process (mine was a little on the long side). Once you have completed the “cleaning” take a vacuum with a brush attachment and vacuum the grooves before applying the grout (it will work so much better if there is no foreign particles in your grout.) As with the mortar I did not need 25 sq.ft. of mortar I needed maybe 10 sq.ft. I also knew the consistency of what my grout had to be so I didn’t need a ratio. The grout needs to be the consistency of cake batter this will be stiff enough that it won’t run all over the floor and will flow nicely in the grooves with the help of a float.

Rubber Float – if you are grouting you need one of these to ensure the grout will be pushed into the grooves and won’t scratch your tile.
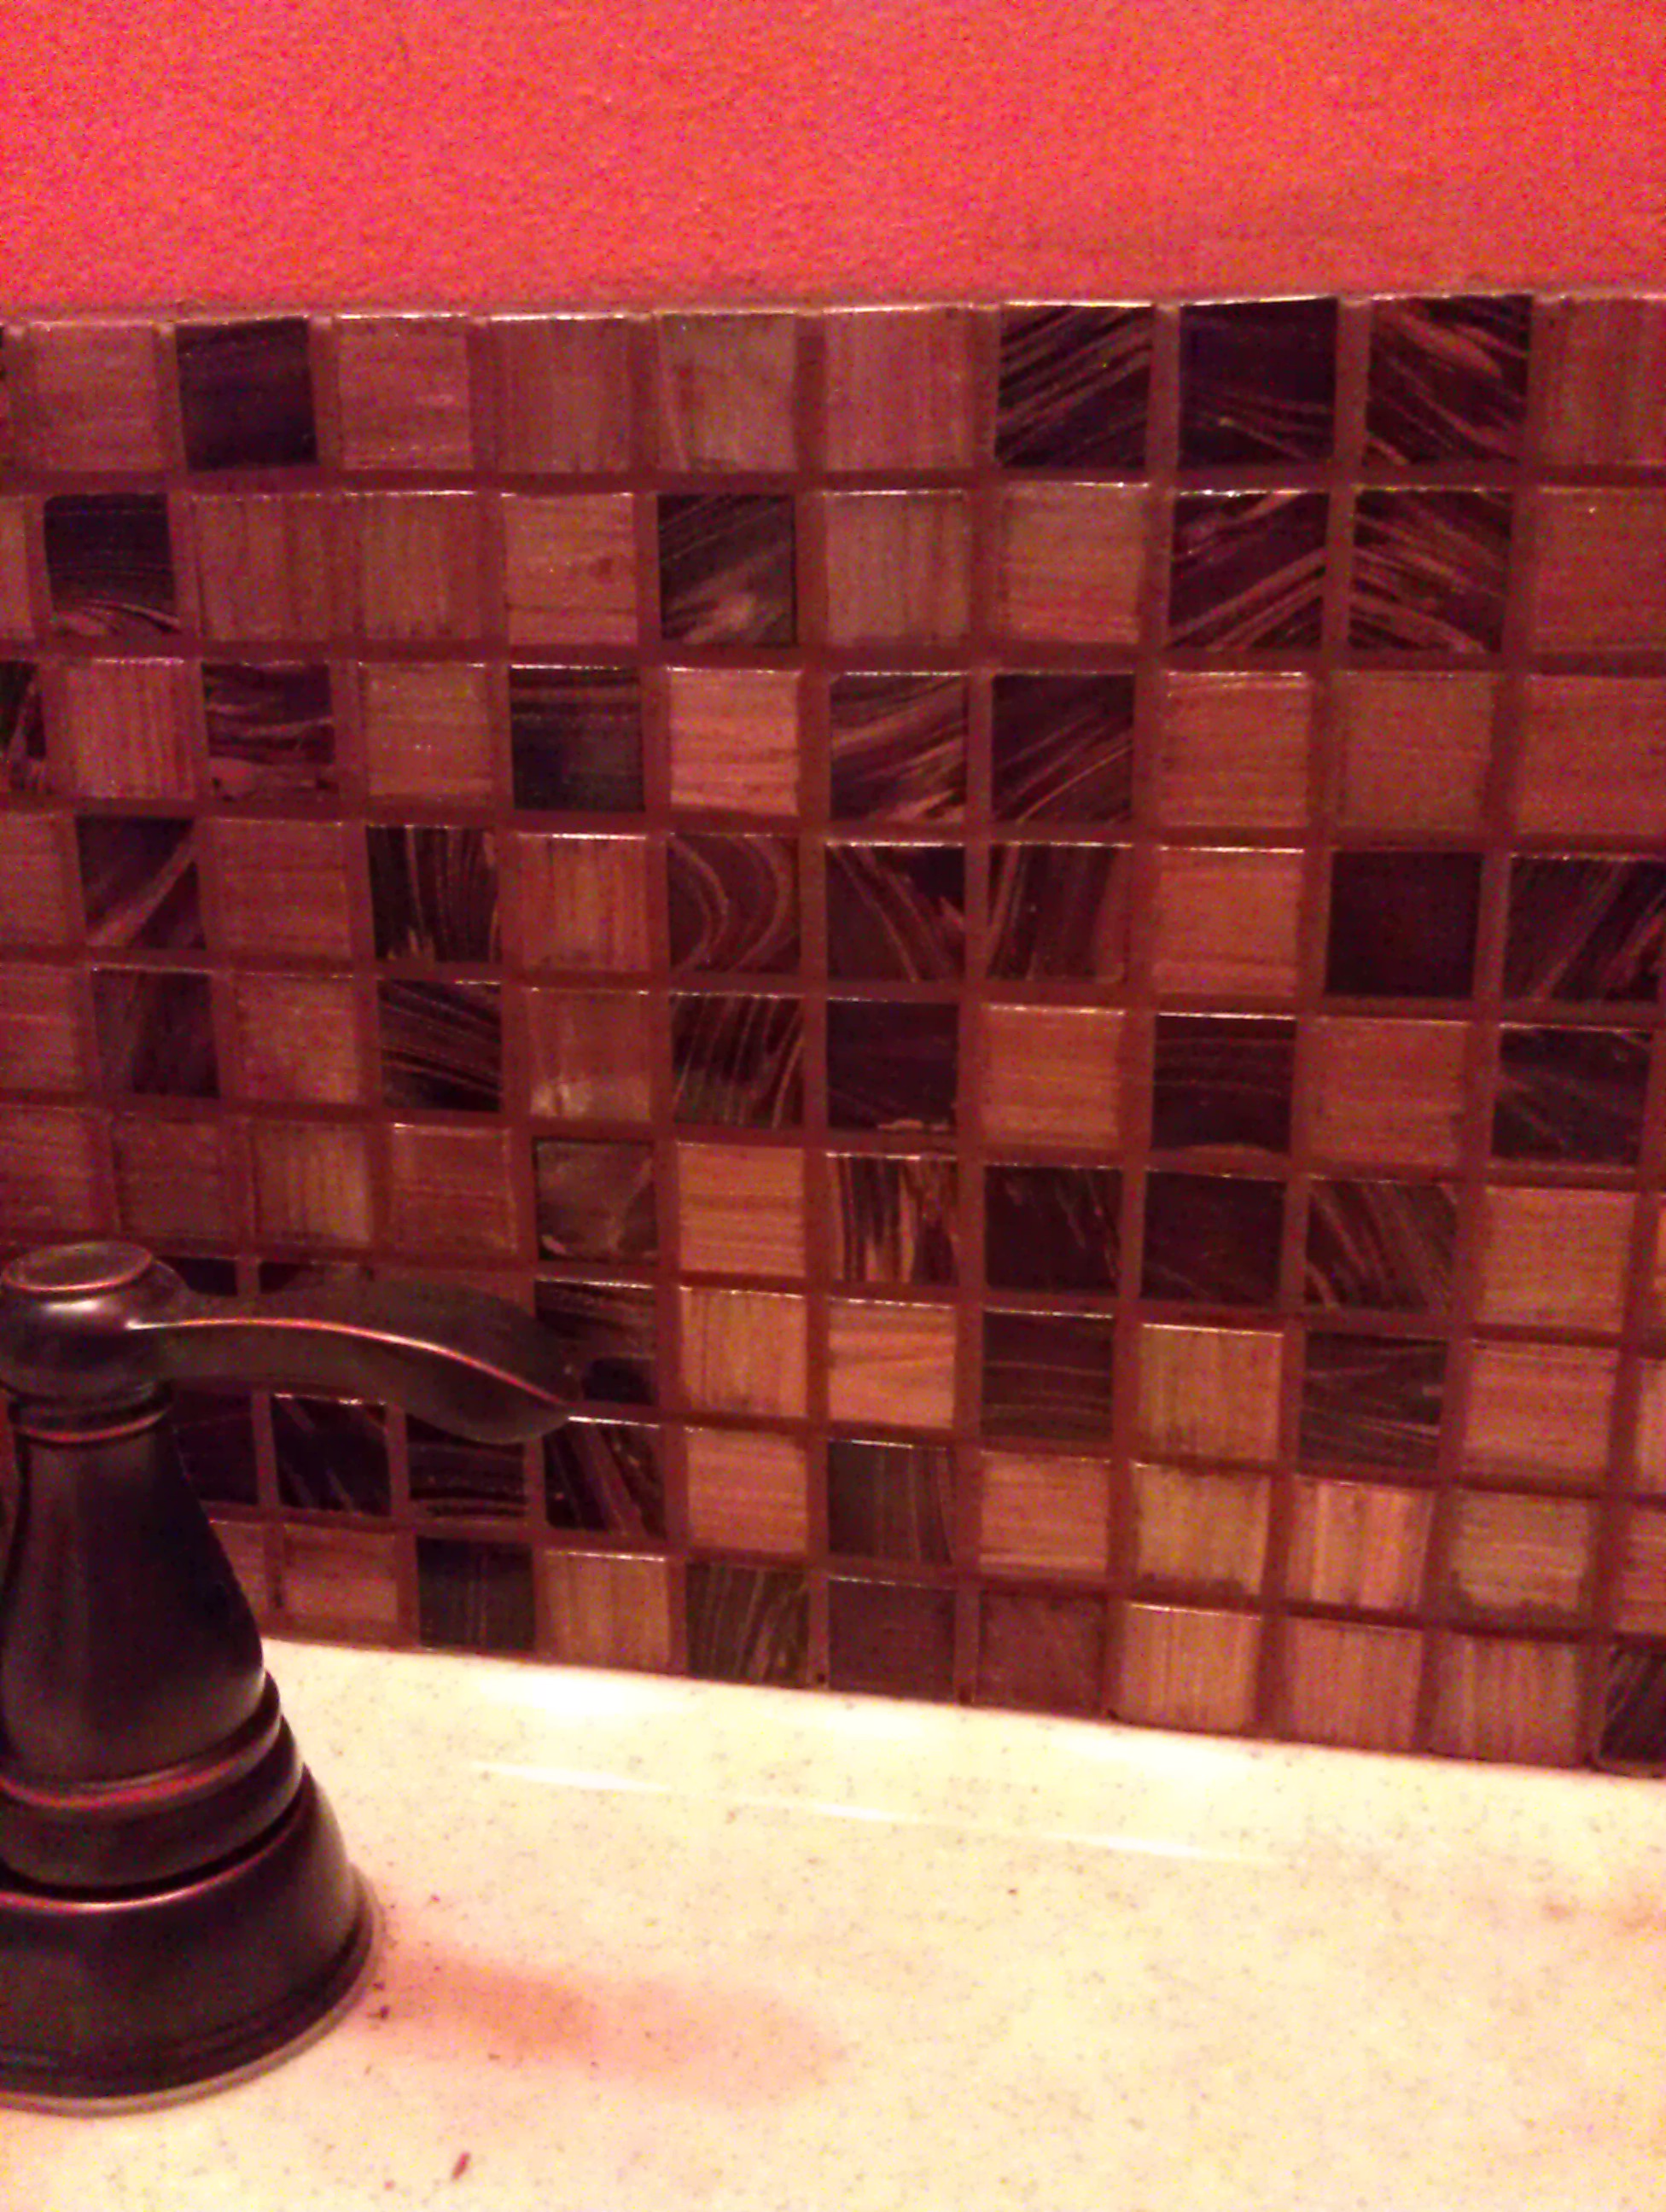
The close up of the tile with the grout. After I was finished with the grouting I took a soft sponge and water and gently rubbed the grout off of the tile. I allowed it to dry and then used cheese cloth to “buff” the tiles to remove the grout from them.
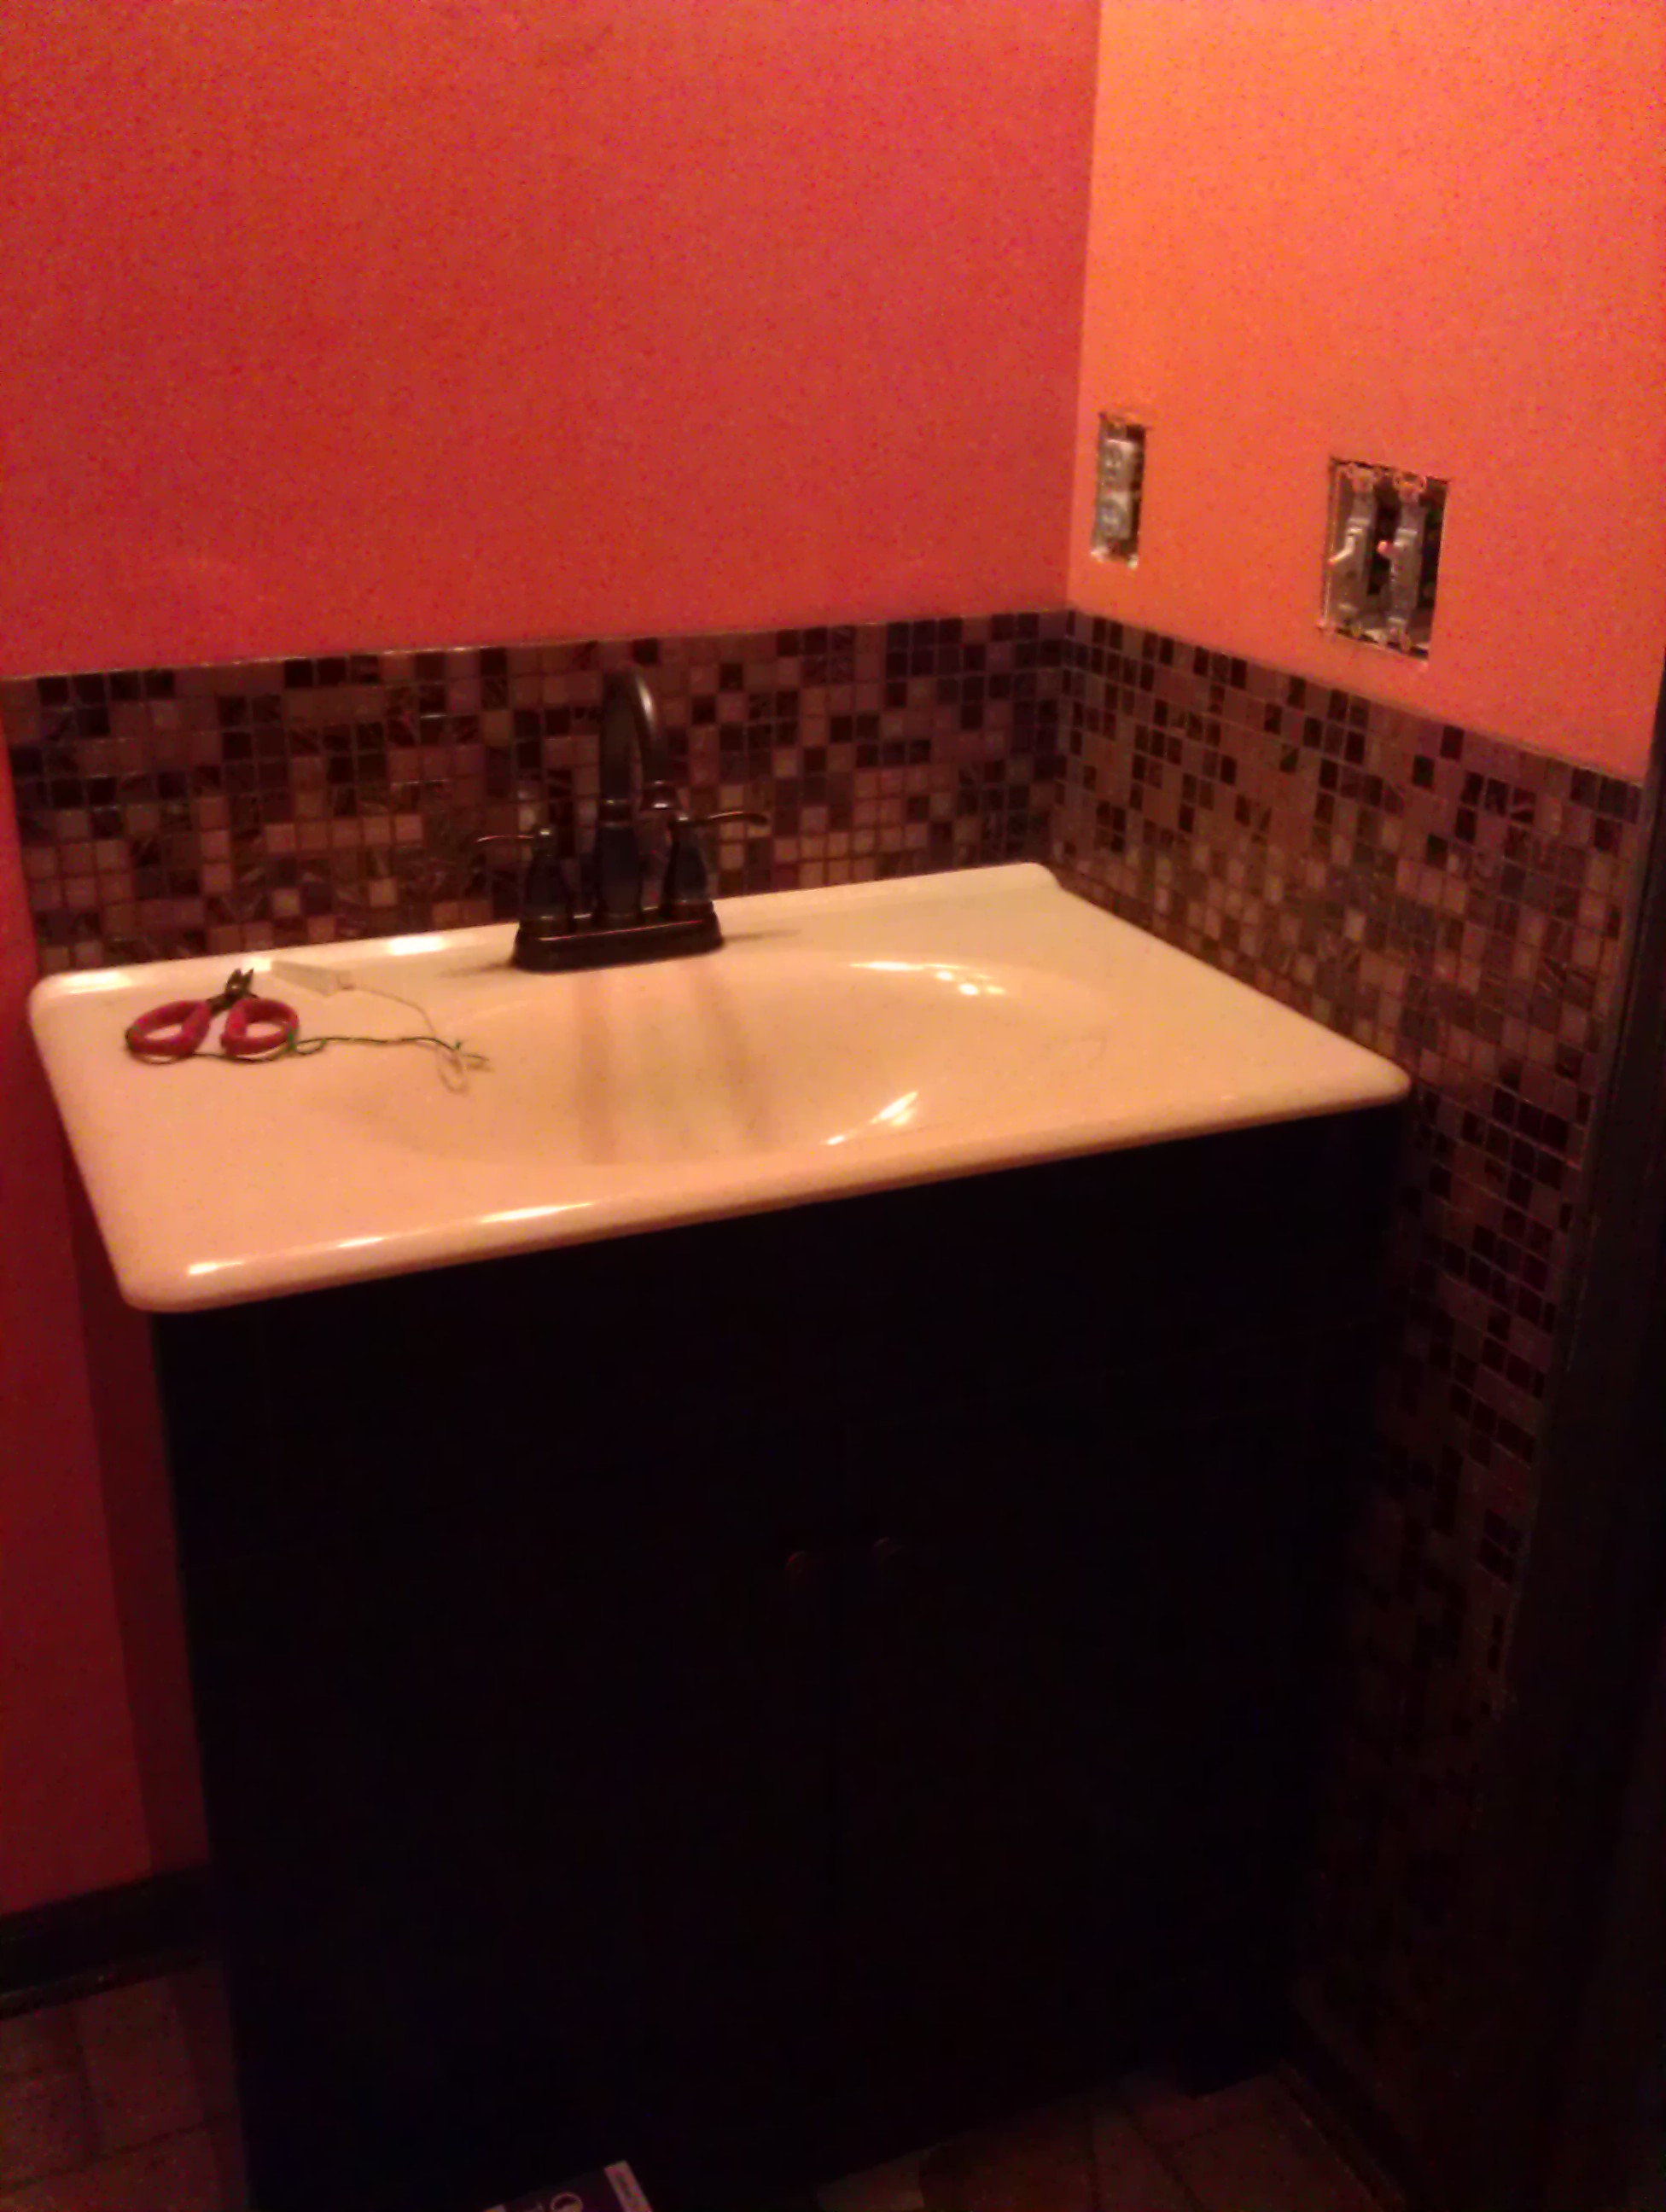
The finished tiling area. I did use clear caulk to adhere the sink to the backsplash and I sealed the backsplash with a grout sealer 48 hours after the grout had cured.
Pros:
- Bathroom looks FANTASTIC for little money. We spent around $60 that was for everything we used: tile, trowel, float, mortar, grout, sealer. Next time I won’t need a Float or a Trowel.
- Little or no experience is needed if you can butter bread you can put mortar on a wall.
Cons:
- Can be very messy (especially the grouting) and time consuming. Not recommended if you are doing it with a Booga (grandparents were visiting and took the kids overnight so we could finish everything).
Would I do this again?
Damn straight! Matter of fact I plan on doing this in my kitchen and even next year in the other bathroom.

Pingback: Part 7: The Big Reveal | Who Are You Calling Crafty?