I really wanted to add a signature to my blog but I really thought it was a huge pain to even attempt it. Well I finally did it through My Live Signature, I still have no idea why I wanted to do it I think because everyone else has one so I wanted one. (Why, yes mom, I will jump off that bridge if everyone else is doing it.) I do get confused fairly easily when it comes to HTML (HARDER THAN MAKING LOLLIPOPS) it is a whole new language that my simple mind refuses to learn. I have tried several times to learn HTML to no avail primarily because Blogger and other programs I use have the nice compose feature that makes everything look pretty and no <a> or <break>, I have committed certain things to memory such as <center> I hate when things aren’t centered! But that is all I have learned with it comes to HTML.
It will say it was pretty easy… here is my Beginners Guide to HTML Signature (I will admit it took me 3 times to figure it out) so I took a bunch of screen shots so anyone can do it (even my mom!)
 |
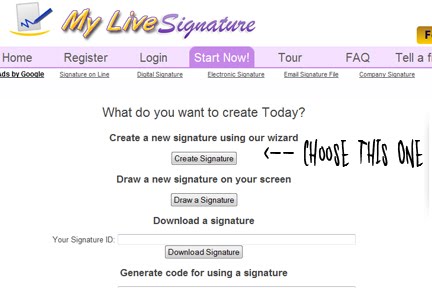
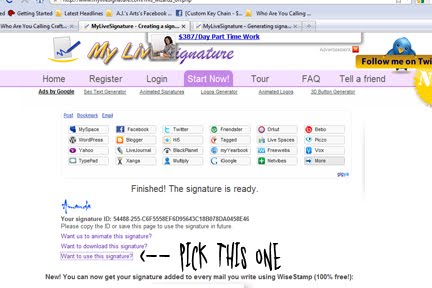
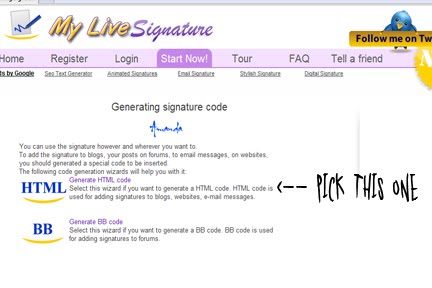
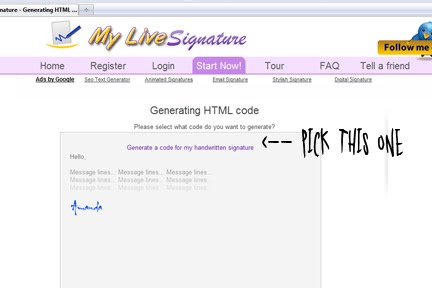
| Choose Create Signature |
 |
| \ |
|
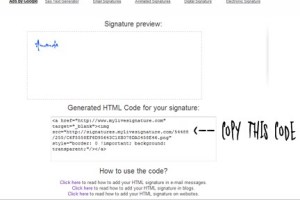 |
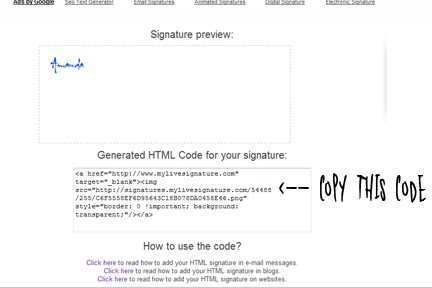
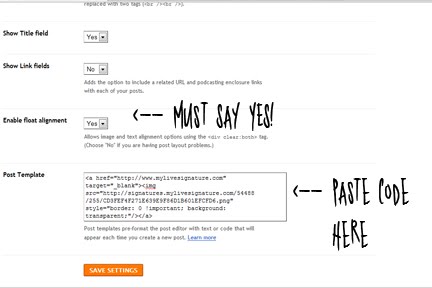
| Copy the HTML Code. Open Blogger –> Dashboard –> Settings –> Formatting |
|
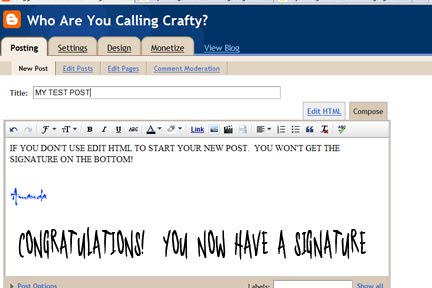
You now have a beautiful signature!

UPDATE:
I went through and changed my signature – I added into the HTML code the Design setting. I followed the Directions from Kevin and Amanda. I liked the Live Signature but I really wanted to use the Frank Lloyd Wright Font and my own design.


This is helpful. I hired a blog designed to do all these wonderful things to my blog (including getting a signature) but apparently she has run off with my money. Looks like I will be doing this myself.
Let me know if you need any help. I am trying to update stuff myself so I will try to do detailed easy instructions 🙂
Nice
nice